Ladybug from a plastic bottle. Ladybug of plastic bottles - a beauty that can be created by your hands!
- Ladybug from a plastic bottle. Ladybug of plastic bottles - a beauty that can be created by your hands!
- How to Make Ladybugs out of plastic Spoons. Quick Recycling Craft: Adorable Ladybugs made from Plastic Spoons
- How to Make Ladybug with Paper Plate. Paper Plate Ladybug Craft
- How to Make a Ladybug for school Project. How to Make a Paper Ladybug Craft
- Giraffe plastic bottle. Men broke into zoo and threw bottle at giraffe’s neck before posting video on Snapchat
- Ladybug bottle. Adorable Plastic Bottle Ladybug Planters
- Recycled insect Project. Insect Recycling Project Attracts Foreign Investor
- Plastic bottle Animal Planters. Making a Plastic Bottle Animal Planter
Ladybug from a plastic bottle. Ladybug of plastic bottles - a beauty that can be created by your hands!
More and more domestic masters are thinking about how a ladybug made of plastic bottles can be made on its own. Most

From the lid
Ladybug made of plastic bottles is mademost easily from the lid. At once it is necessary to prepare red, black and white paints. We take a cover with such containers of any size (starting from 0.5 and up to 5 liters - everything is suitable). Cover it with red and give it the ability to dry. In the next step, make a black center line, face and points

Capacity of 5 liters
To create such a statuette, you need a largecontainer with a capacity of 5 liters. We lay it on one of the lateral faces. From the underside of the neck we draw a line with a marker parallel to the lower face along the entire perimeter. That is, starting from the neck, then - along the cone, lateral face, bottom, next side, on the other side of the cone and return to the starting point. Cut the resulting blank along this line. This product is made in a manner similar to the previously described method only with the difference that there the ladybug of plastic bottles was small, and here there will be a large statuette that will become a worthy decoration of your collection of plastic crafts. As a head in this case, a lid and a neck are used.
Large flower bed
For such a flower bed, we need a set ofred, white and black containers. They can be made by coating the paint with the appropriate color of any container. It is preliminary to make calculations and determine the approximate

Conclusion
It's not such a rarity that such crafts fromplastic bottles for the garden. Photos that often occur, this is confirmed. In the first case, everything is very simple, and such a modest work can even be done by a preschooler. But the last two crafts already require more thorough preparation. It is recommended that such figures be made by skilled craftsmen who have a hand in this business.
How to Make Ladybugs out of plastic Spoons. Quick Recycling Craft: Adorable Ladybugs made from Plastic Spoons
I’ve loved ladybugs since I was a little girl; I think these pretty little beetles are one of the most-loved insect species. Despite the nickname, though, the entire ladybug population does not exist purely of ladies, there are males out there too. There’s an interesting legend behind the “lady” part. It is said that hundreds of years ago, farmers’ crops were being devoured and ruined by pests, so they prayed to the Virgin Mary to ask for help. Apparently, their prayers were answered with a swarm of these spotted beetles that ate the pests and ultimately saved the crops. Mary (aka Our lady) has always been depicted as wearing a red cloak, so since these savior beetles wore her same color, the farmers were convinced they were sent by her. “The beetles of Our Lady” eventually became “Lady beetles”, and then, Ladybugs. It’s a cute story.
But I digress…. Let’s learn how to make these cuties!
You’ll need:
- Side-cutting pliers
- Hot glue gun
- Black paint
- Two elongated black beads
- Three plastic spoons – one black and two red (or if you already have white spoons laying around, simply paint them or color with permanent markers)
Instructions:
- Use the pliers to cut off the arm part of each spoon
- Turn the spoons upside-down
- Apply some glue to either side of the black spoon and attach the red spoons to make the slightly-opened wings
- Glue the beads to either side of the “head” for the antennae
- Use the paint to make little spots on the wings
This is a really fun and cute little craft to get the kids involved. You can use these to decorate your potted plants or walls in the little ones’ bedrooms or playrooms. I’d actually even use them as name tags when having a dinner outside!
Simple, quick, easy, and you get to make something out of what would otherwise be trash. Project gallery available here . Tutorial video by Recycled Bottles Crafts Youtuber.
I've loved ladybugs since I was a little girl; I think these pretty little beetles are one of the most-loved insect species. Despite the nickname, though, the entire ladybug population does not exist purely of ladies, there are males out there too. There's an interesting legend behind the "lady" part. It is said that hundreds of years ago, farmers' crops were being devoured and ruined by pests, so they prayed to the Virgin Mary to ask for help. Apparently, their prayers were answered with a swarm of these spotted beetles that ate the pests and ultimately saved the crops. Mary (aka Our lady) has always been depicted as wearing a red cloak, so since these savior beetles wore her same color, the farmers were convinced they were sent by her. "The beetles of Our Lady" eventually became "Lady beetles", and then, Ladybugs. It's a cute story.
But I digress…. Let's learn how to make these cuties!
You'll need:
- plastic spoons
- black paint or markers
- red paint or markers
- glue
- scissors
- antennae (optional)
Instructions:
- Start by painting the plastic spoon with black paint or markers. This will be the body of your ladybug.
- Let the paint dry completely.
- Use red paint or markers to add spots to your ladybug. You can make them as big or as small as you like.
- Use glue to attach the antennae (if using) to the top of the ladybug's head.
- Use scissors to trim any excess glue or paint.
- And that's it! You now have a cute little ladybug made from a plastic spoon.
This is a really fun and cute little craft to get the kids involved. You can use these to decorate your potted plants or walls in the little ones' bedrooms or playrooms. I'd actually even use them as name tags when having a dinner outside!
Simple, quick, easy, and you get to make something out of what would otherwise be trash. Project gallery available here. Tutorial video by Recycled Bottles Crafts Youtuber.
How to Make Ladybug with Paper Plate. Paper Plate Ladybug Craft
*this post contains affiliate links*
are a ton of fun to make. And today we are going to make a paper plate ladybug.
We named our little ladybug Mug. You know, ladybugs are so tiny in real life, tiny as the smallest button, and our ladybug will be a giant one, the mother of all the ladybugs in the world, ok?
Do you know what is interesting about ladybugs? They talk! That’s right. And when they are happy they jump.
And when they are mad, they point their tiny tongues out. They are super silly, that is why we like them! We are naturally joking, but all this can be true for your crafted ladybug.
How to Make a Paper Plate Ladybug Craft
What you need:
- two paper plates
- red acrylic paint
- a black acrylic paint
- a sparkly black self-adhesive foam sheet
- a sparkly red self-adhesive foam sheet
- two self-adhesive googly eyes
- two black pom poms
- two split pins
- two black chenille sticks
- a ruler with circular shapes
- pencil
- glue
- scissors
Body
Use your black acrylic paint and color the back of one of the paper plates.
Wings
Take your red acrylic paint and color the back of the other paper plate …
… then take your scissors and cut the paper plate in half.
Those would be the wings.
Draw a heart-like shape on the back of the red self-adhesive foam sheet using your pencil.
Cut out the heart shape using scissors …
… then glue it on top of the black paper plate.
Draw some circles on the back of the black self-adhesive foam sheet (use your ruler with circular shapes) …
Cut them out …
… and place them on top of the red paper plate.
Put one split pin through each of the wings …
… and through the black paper plate too.
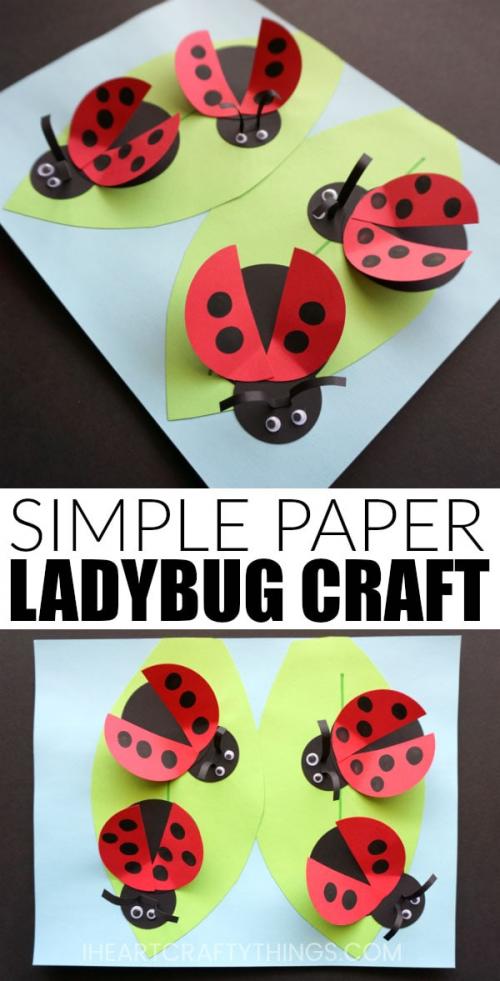
How to Make a Ladybug for school Project. How to Make a Paper Ladybug Craft
Do your kids love ladybugs? When I was a kid every kind of bug gave me a fright except for ladybugs. I would squirm and be crazy about any kind of insect or bug landing on me or flying around me but when a ladybug was near, I was eager and ready to explore it and never shied away from picking one up or loving when they would land on my hand. If you have ladybug fans in your home, they are going to adore making this simple paper ladybug craft .
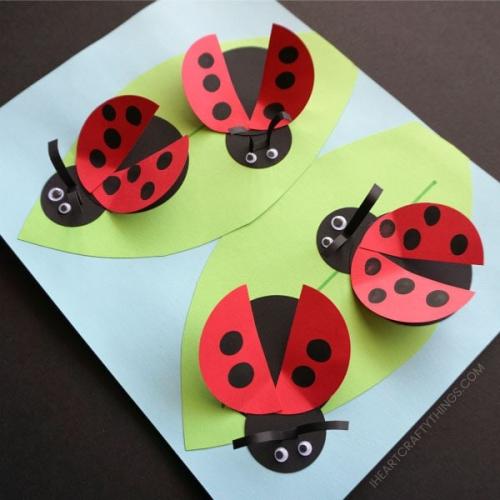
The fingerprint spots on the ladybug wings gives this fun spring craft a personal touch. Kids will also adore how we made the wings pop off the page as if the ladybugs are in flight. With only a few supplies and a morning or afternoon of crafting fun, you will have this darling paper ladybug craft finished in no time at all.
How to Make a Paper Ladybug Craft
This post contains affiliate links to the products mentioned. I Heart Crafty Things is a participant in the Amazon Services LLC Associates Program, an affiliate advertising program designed to provide a means for sites to earn advertising fees by advertising and linking to amazon.com.
Supplies:
- light blue cardstock
- light green cardstock
- red cardstock
- black cardstock
- black paint
- small googly eyes *
- green marker
- 3-inch circle punch (optional)
- 2-inch circle punch (optional)
- scissors
- glue
*We received our googly eyes from our friends at Oriental Trading. Any opinions mentioned are 100% my own.
Instructions:
1. Cut out four, 3-inch circles from your red cardstock paper. Add a small amount of black paint onto a small dish or paper plate. Dab your finger into the black paint and print it onto a red circle to make ladybug spots. Add as many or as little dots as you’d like. Add dots to all four red circles. Set them aside to allow the paint to dry.
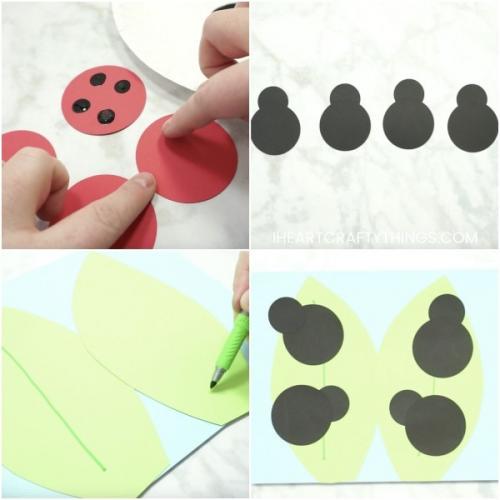
2. Cut out four 3-inch circles and four 2-inch circles from your black cardstock. Glue the smaller circles onto the larger circles to form ladybug bodies.
3. Cut two big leaves out of your light green cardstock. We found it easiest to cut our green cardstock in half and then cut a leaf out of each half sheet of paper. Glue the leaves onto your light blue cardstock. Then use a green marker to add a line down the middle of each leaf.
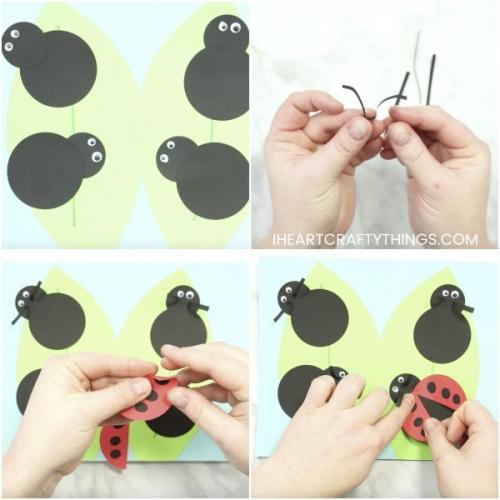
4. Glue the four ladybug bodies onto the leaves of your paper. Then glue googly eyes onto the face of the ladybugs.
5. Cut four small strips from your black cardstock. Bend the strips into an antennae leaving a flat base in the middle of the antennae. Add some glue to that flat base in the middle of the antennae and glue it onto the face of the ladybug behind the googly eyes.
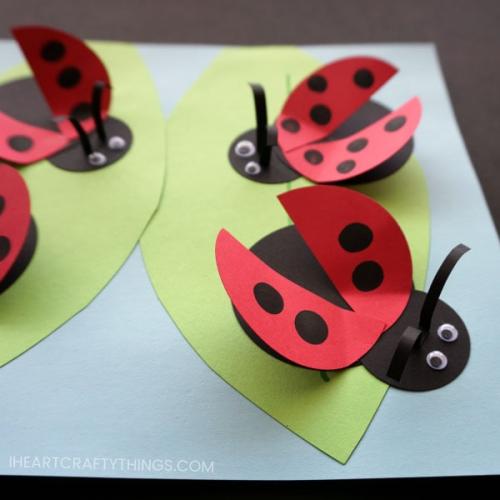
6. Once your black paint spots have finished drying, it’s time to create the wings for your paper ladybug craft. Cut the red circle in half. Bend down a small section at the top of the half circle, add glue to it and glue it down on top of the ladybug body. Repeat with the other half of the circle. Then do this with the remaining three red circles.
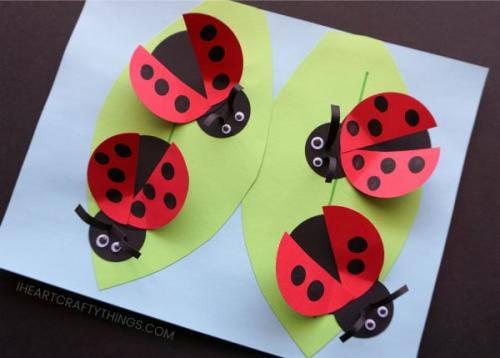
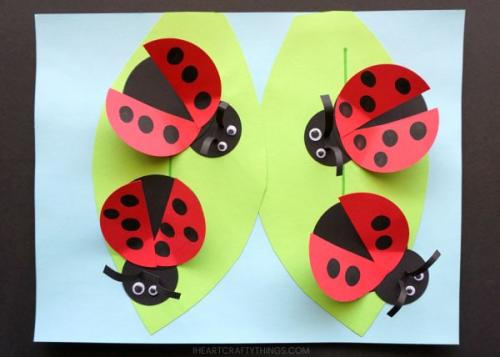
Your paper ladybug craft is complete!
Leaving the back half of the ladybug wings unglued from the paper gives the ladybugs a fun 3D effect looking as if the bugs are getting ready to land or take flight off of the leaves. For additional details , you can use a black marker to add legs to all of your ladybugs.
Looking for more fun spring bug and insect crafts?
This colorful 3D paper butterfly craft is sure to be a hit for spring. The butterfly wings pop off the page looking like the butterflies are flying around.
Check out this list of over 25 adorable insect arts and crafts ideas , perfect for kids of all ages!
Giraffe plastic bottle. Men broke into zoo and threw bottle at giraffe’s neck before posting video on Snapchat
Two men broke into a zoo, threw a bottle at a giraffe and filmed the ordeal before posting it on Snapchat, a court heard.
Bradley Green and Nathan Daniels, from Fareham, Hampshire, admitted to breaking into Marwell Zoo, Hampshire, when it was closed during Covid lockdown.
A police helicopter and armed police were called out when someone spotted the video and called 999.
The prosecution told Winchester Crown Court how the pair cut the zoo’s fence so they could get into the grounds on February 15, 2021. The doors of the giraffe and penguin enclosures were also damaged.
The next morning, a plastic disinfectant bottle, sticks and stones were found in the tiger enclosure, while a bucket and another bottle of disinfectant were found in the giraffe enclosure.
A life ring was found in the pool in the penguin enclosure and Ellie Fagin, prosecuting, said: ‘The penguins displayed behaviour consistent with anxiety and distress from being disturbed.’
Daniel Reilly, defending Green, said his client has attention deficit hyperactivity disorder, and he has ‘deep regret and remorse’ for his actions and threw the bottle at the giraffe ‘to get its attention’.

Ladybug bottle. Adorable Plastic Bottle Ladybug Planters
I love ladybugs, and I love recycling - so of course, this is a great little project for me. These simple and fun ladybug planters are a great way to recycle and empty soft drink bottles while also adding something cute to your home or garden. The planters are super easy to make and absolutely adorable.
Ladybug Planters
If you want something fun, perhaps a bit whimsical, add these ladybug planters to your garden. It's a great recycled project that is fun and easy to make, plus ideal if you like the fun little creature that is the ladybug. They are great to make and put on your porch railing, in the garden, or even as a centerpiece in your home. You can even give them to friends and family or fellow gardeners!
Of course, if you are a fan of ladybugs, then you might like our tin can ladybug pencil holder , or even this upcycled bowl ladybug decoration idea. They are so fun and super easy to make! You could even make this upcycled ladybug CD or even this cute little upcycled planter ladybug as decorations in your garden.
Can I Use These for Real Plants?
You can absolutely use these for real live plants. I love them for any little fake plant, or even just a simple succulent added inside, but they work great for real plants. You can either leave the plants in a smaller planter and tuck them inside this one or punch a few holes in the bottom of the bottle for drainage and plant them directly into the bottle.
Where Can I Display a Ladybug Planter?
These ladybug planters can be displayed anywhere. The ladybug planters can be displayed inside and outside. If you are displaying it outside, you might want to seal the paint so that it doesn't come off in the weather.
Place the plants on your front porch or patio. It can be placed on a windowsill inside your home. Hang the planter from a tree in your yard. Get creative and have fun with it.
Can I Make These Into Different Creatures?
I love using this as a base idea but turning it into something unique. Different creatures or even just fun colors for the ladybug can all be done. I used red, yellow, and pink on this project, but you can use any paint color you prefer. Below are a few more ideas of creatures you can make using this similar method.
- Bumble Bee: Paint the pieces black and yellow then leave the wings clear or with stripes. Add black pipe cleaners as feet or use additional painted pieces of plastic.
- Dragonfly: Paint with blue, green, and yellow paint. Make the wings longer and pull/curl them more outward than the ladybug wings.
- Caterpillar: Paint it green and black or yellow and rather than adding wings, leave it longer instead of cutting it in half.
- Butterfly: Use multiple colors for the wings but make them more curved like a butterfly and match on both sides. Make the antennae a bit longer or use pipe cleaners instead.
This is going to be something you can use as a base for many different projects. Use your imagination and have fun creating your own creature.
What Else Can I Do to Decorate My Plastic Bottle Planters?
I love the simplistic options shown, but you can get creative and make your ladybug super cute using other embellishments. Ribbons, stickers, and even washi tape can add something unique to the ladybug planter. Of course, everything is more fun with glitter too! So, feel free to add a bit of sparkle to the craft.
Another fun idea can be to add felt dots in place of the marker dots or even make the dots in alternate colors instead of the standard black. Painting a face on the front instead of using googly eyes is also an option. I would use white or pink paint pens to create more depth of color on the lid.
Of course, you can go extra with some sequins, and rhinestones, using completely off-the-wall colors, or even spray painting it gold, silver, or bronze. Things like puff paint can also be used to create more 3D additions like the dots or eyes on the ladybug. Just get creative and you'll love the results!
Supplies Needed
- Empty plastic bottles (water or soda)
- Red spray paint
- Black craft paint
- Black paint pen
- Jewelry wire
- ½" wide washer
- Googly eyes
- Scissors
How to Make a Ladybug Planter
Begin by cleaning out the plastic bottle and letting it air dry. Remove all labels or glue from the outside. Then, cut the center flat portion of the bottle out and set it aside. This will leave you with just the bottom and top neck end.
Cut two 1" strips of this flat piece. Carefully curl one end of those pieces to create the look of an antenna to go on the front of the planter. Set them aside.
Next, cut just below the neck/lid of the bottle and set aside the lid portion.
Recycled insect Project. Insect Recycling Project Attracts Foreign Investor
Entoprotek, an organic waste processing company, has attracted $2 million in investments from Israel’s Granot, representatives of the parties said. In total, the current round is designed for $30 million, it is planned to be completed by the beginning of the fourth quarter of 2022, says a representative of Entoprotek. In addition to investing in the Russian plant, Entoprotek and Granot have agreed to jointly finance an enterprise for the production of feed protein from organic waste in Israel, representatives of the parties say. They do not name investments in this project and terms of implementation. In addition, the possibility of cooperation in the Middle East and Africa is being considered.
Entoprotek was founded by Naum Babaev and Rashid Khairov, the owners of Damate, the largest turkey producer in Russia, and their partners Ivan Sokolov and Alexander Bastrakov in 2016. The company uses black lionfish larvae to process food waste. According to Sokolov, they eat waste for seven days. After that, the company makes several types of products from the insect itself: a protein feed additive for livestock enterprises, fat, which serves as a component for feed, as well as for cosmetics and medicines. Now the plant, located in the Penza region, is designed to process 15 tons of waste per day.
Granot is the largest agricultural cooperative in Israel, controls 20 factories and enterprises, including fruit, meat, etc., founded in 1940. It also includes companies from the fields of energy, finance, education, etc. Annual turnover, according to its own data, exceeds $1 billion. Granot believes that the waste recycling project has potential, says the company’s director of innovation and business development, Oran Scott. According to him, she is interested in projects related to advanced farming and agriculture, and constantly monitors them.
Entoprotek is the first plant in Russia to recycle waste using insects, says Sokolov. According to him, now there are about 50 such plants in the world, and the company is in the top ten in terms of processing volume. Investments in the current round will be directed, among other things, to expanding production – it is planned to double it to 30 tons in 2022, says Sokolov. In this case, she can get into the world top 5.
Russia has rather large volumes of organic waste. These are, for example, the loss of products at the stage of their transportation, storage, as well as the written-off products of retail chains, says Sokolov. According to him, at best, 1% is recycled, the rest ends up in landfills or is not disposed of at all. Rashid Ismailov, chairman of the public organization Russian Ecological Society, agrees with these: the processing of food waste is now extremely relevant, since there are no large enterprises in Russia yet. But 15 tons per day is a small amount, he notes. In Russia, there are capacities for processing organic waste into compost, their total capacity is 1.7 million tons per year, says Denis Butsaev, General Director of the Russian Ecological Operator. This material is subsequently used as a technological soil for filling landfills and fertilizers for landscaping (for example, for flower beds), as well as an alternative fuel for the cement, metallurgical and other industries. But processing with the help of insects has not yet found wide application, says Butsaev. But it has advantages: 85% less landfill and greenhouse gases are emitted into the atmosphere than composting. He believes that more active use of such technologies in Russia is possible in the future.
.
Source: www.vedomosti.ru
*The article has been translated based on the content of www.vedomosti.ru . If there is any problem regarding the content, copyright, please leave a report below the article. We will try to process as quickly as possible to protect the rights of the author. Thank you very much!
*We just want readers to access information more quickly and easily with other multilingual content, instead of information only available in a certain language.
*We always respect the copyright of the content of the author and always include the original link of the source article.If the author disagrees, just leave the report below the article, the article will be edited or deleted at the request of the author. Thanks very much! Best regards!
Plastic bottle Animal Planters. Making a Plastic Bottle Animal Planter
Total Time: 1 hour
Yield: 1 planter
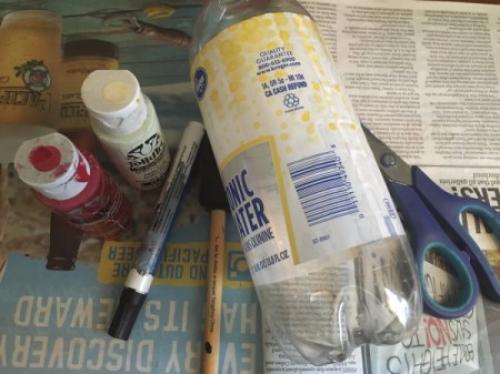
Supplies:
- 1 medium to large plastic drink bottle
- scissors
- acrylic paints
- paint brush or sponge
- marker
- newspaper
Steps:
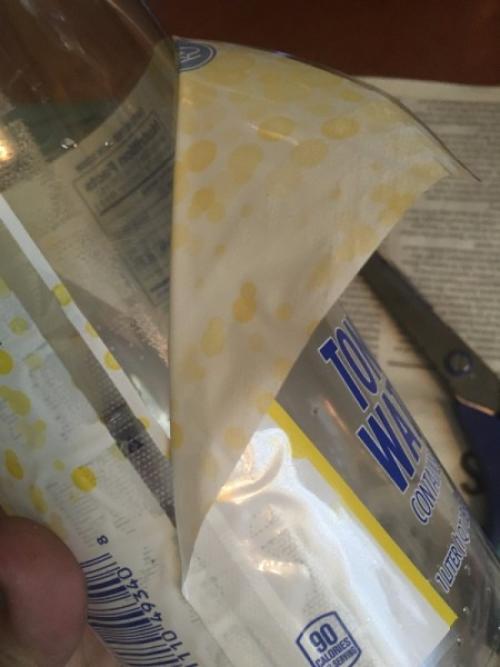
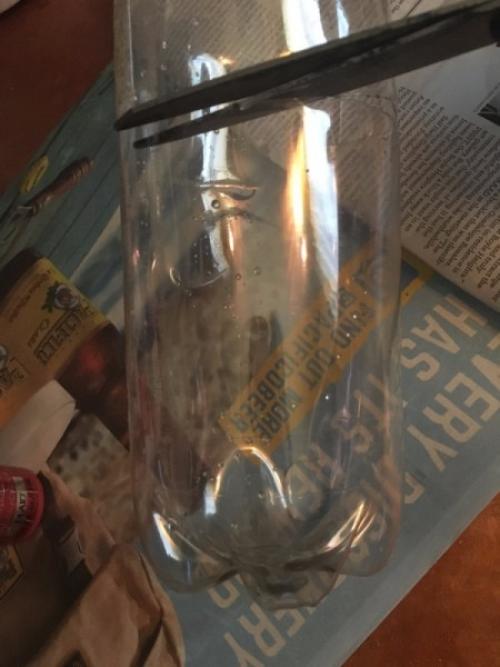
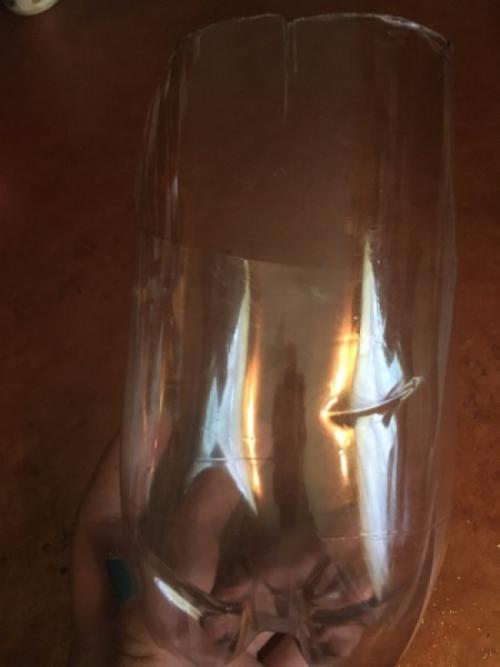
- Peel off any labeling. Clean and dry the outside of the bottle.
- Puncture the bottle with your scissors then start cutting horizontally in half. If you want to do something like a bunny with tall ears, cut higher up the bottle.
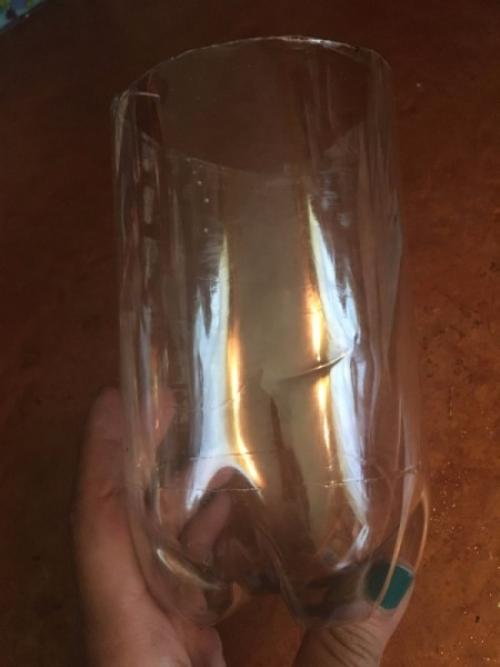
- Cut the back half of the bottle off. The front will have your animal face and ears.
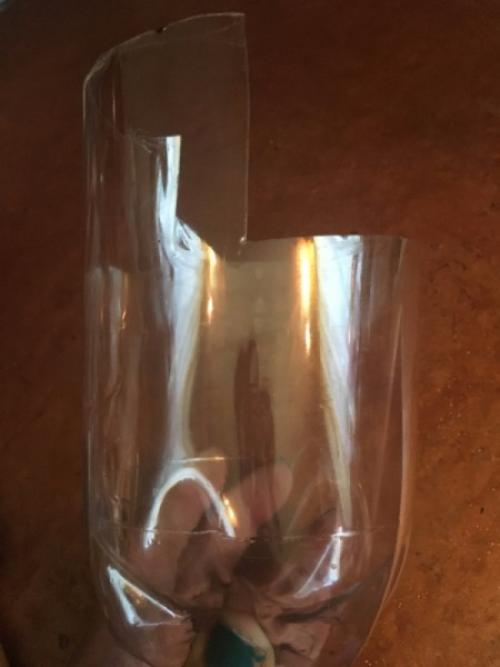
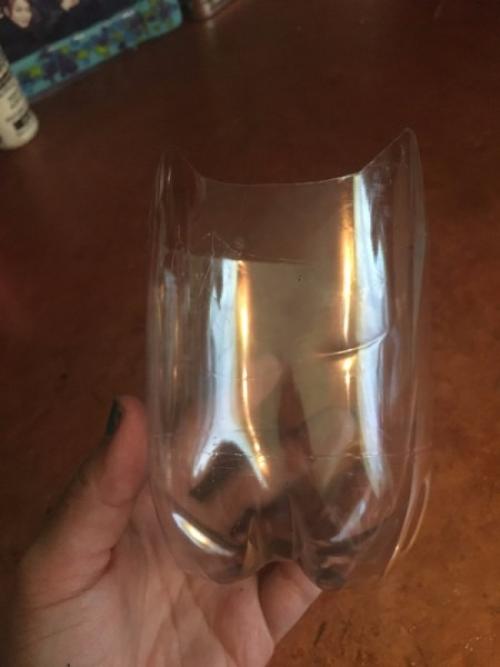
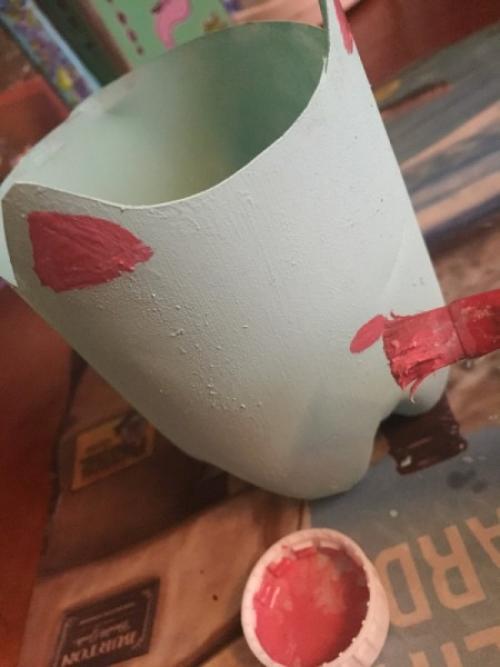
- Make a short vertical cut down the middle of the front of your bottle. You can use the middle between the two "feet" at the bottom as your guide. This cut will serve as the halfway point of your animal face, between its ears.
- Cut out the shape of your animal's ears.
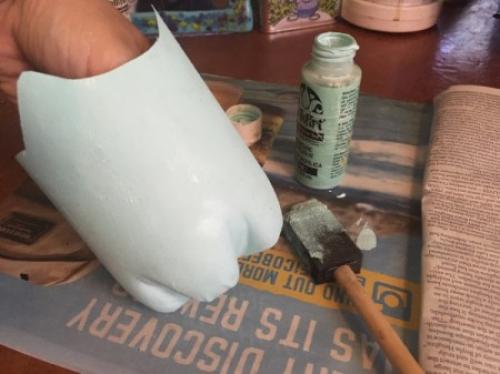
- Start painting your bottle on top of some newspaper. I used a sponge brush so there would be no streaks, using a swipe and dab method. I spread my non-painting hand out on the inside of the bottle to keep my hands clean while I turned the bottle. You could also use spray paint. Let dry.
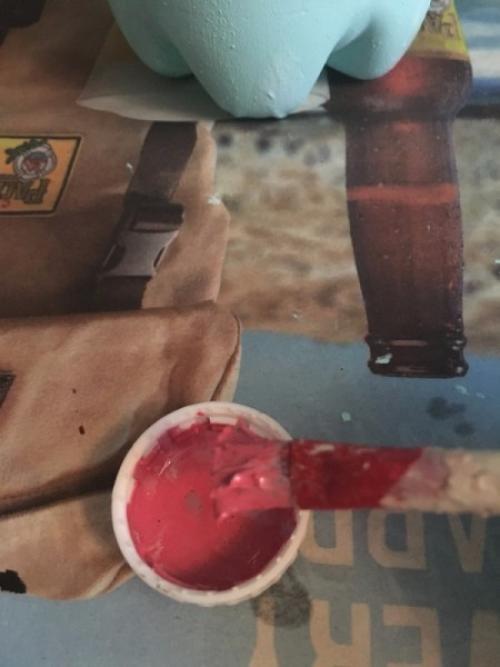
- Start adding details like ears and a nose. I mixed paint in the bottle top to be extra thrifty!
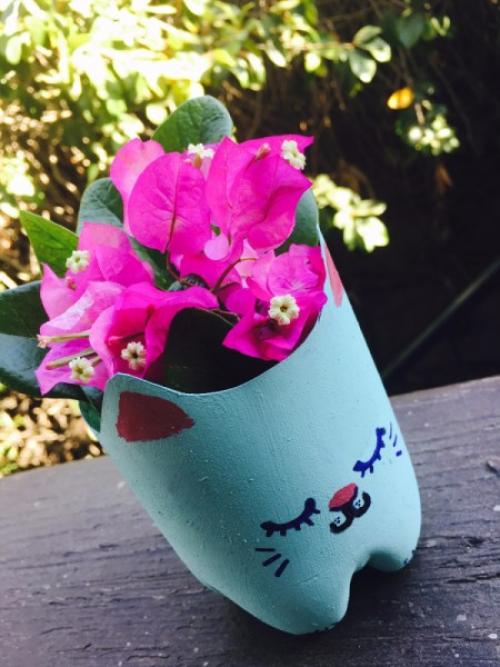
- For more precise details, go in with a marker for eyes and whiskers. I put little paws on the bottle nubs.
- You can transfer an entire potted plant into this as long as it fits, or put flowers and water directly inside.